synapsium alpha build #2
30 December 2025
changelog
text/UI
- changed the game’s font from raylib’s default to GrapeSoda.
- level select UI now displays the level’s name on hover (or if it is the currently active level).
- fixed issues where text was not being centred/aligned correctly.
particles/nodes
- particles now “freeze” (i.e. their motion is stopped) when a node is being dragged.
levels
- repositioned nodes in the level invert.
- repositioned nodes in the level reflection (was originally called echo).
- added a new level: juxtapose.
a deeper dive into the changes
my current goal is to add more UI to the game.
in the previous update, i added a “level selector” UI element. this is essentially a collection of buttons, each of which is linked to a level. clicking on one of these buttons transitions the player to the button’s linked level. i know, i know, very fancy.
i’ve since tweaked the level selector UI slightly. i’ll show off the changes shortly, but first i must take you on a minor tangent.
in the below code snippet, i’ve provided the level class’ constructor.
level(std::string name) : scene(std::move(name)) {}if you’re familiar with C++, you’ll know that this snippet means that the level class’ constructor takes a single name parameter.
moreover, the level class is a derived class of the scene class, and when constructing a level we are calling the scene class’ constructor
by simply passing the name parameter to it.
in non-technical jargon, all that we’re trying to say here is that when a level is constructed it must be given a name.
for example, here you can see me constructing the first level of the game:
auto conjoin = std::make_shared<level>("conjoin");you’ll notice that this level is given the name conjoin.
now, i initially wanted to give each level/scene a name because it felt very natural from a programming perspective. however,
i wasn’t really using these names for anything. the first level originally had the very creative name “first”, the second “second”, and so forth.
i recently realised that i could use these names to give each level a unique identity. from a game design perspective, i want each level to either introduce the player to a new concept or help reinforce a concept that they’ve already seen.
since this is an abstract puzzle game, i thought that the name of each level could either hint at what the level is trying to communicate or allude to how the level should be solved.
thus, i’ve given each level a unique name and updated the level selector UI to be able to display the names of the levels.

font changes
you may also notice that the font being used is no longer raylib’s default font. i’m now using the wonderful GrapeSoda font.
i thought that changing the font would be relatively simple. after all, raylib has the following straightforward-looking function:
Font LoadFont(const char *fileName); // Load font from file into GPU memory (VRAM)however, i ran into an issue with displaying the name of one of my levels which is called “déjà vu”.
this level’s name contains the characters “é” and “à” which, as far as i’m aware, are not loaded when calling LoadFont.
instead, i had to use raylib’s LoadFontEx function as shown below to get the additional glyphs to display correctly.
std::vector<int>  glyphs;
const int STARTING_GLYPH_IDX = 32;
const int FINAL_GLYPH_IDX = 255;

for (int glyph_idx = STARTING_GLYPH_IDX; glyph_idx <= FINAL_GLYPH_IDX; ++glyph_idx)
{
  glyphs.push_back(glyph_idx);
}

font = LoadFontEx("fonts/GrapeSoda.ttf", INHERENT_FONT_SIZE_, glyphs.data(), static_cast<int>(glyphs.size()));
i also encountered another issue when experimenting with different potential fonts.
you see, to place a string centred at a particular location on the screen (such as the level numbers in my level select UI), you can use the following raylib function:
Vector2 MeasureTextEx(Font font, const char *text, float fontSize, float spacing); // Measure string size for Fontthis returns (in a Vector2) the width and height of the text’s bounding box. with some elementary vector maths, you can use this
bounding box to place text centred at a given position with a minor caveat: for an arbitrary font, the bounding box isn’t guaranteed
to “hug” the glyph completely.
this meant that text wasn’t being centred correctly and i had no idea why (since my maths was correct). it wasn’t until i visualised the bounding boxes that i realised the issue, then switching to a bitmap font seemed to fix the problem.
freezing particles
one potential issue that i saw in my game was that the particles continue to move even when the nodes are being moved around the screen by the player.
since each node emits a sound when a particle arrives at it, a player could accidentally (or intentionally) drag two nodes on top of each other, making the particle rapidly move between the two nodes and hence force both nodes to constantly attempt to emit a sound.
to avoid this problem, i modified my code a bit such that whenever a node is being moved, all particles are frozen in place until the movement stops.
to make things clearer, in the future i’ll probably add some sort of snowflake texture that the particle will switch to when it’s frozen.
level changes
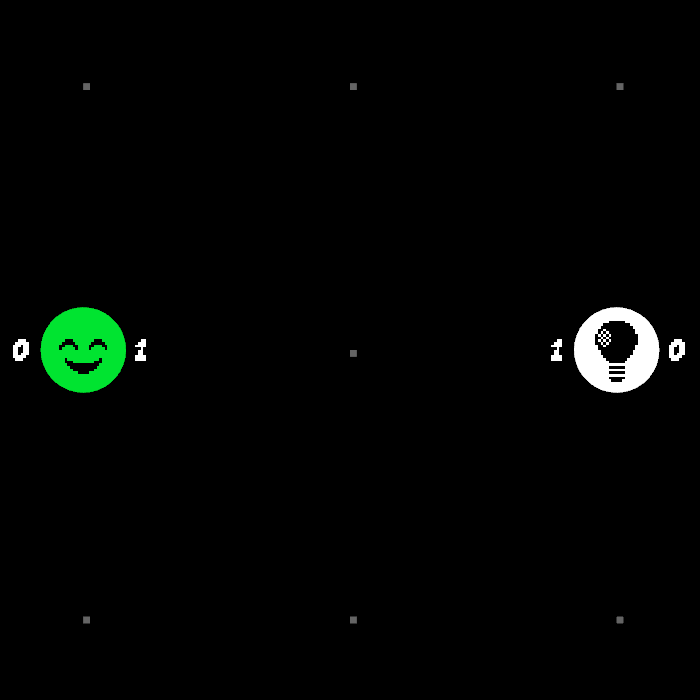
the two levels that i’ve changed are called invert and reflection.
these levels are essentially the same as one another, with the only difference being the emitter and bulb in reflection are the inverse versions of the emitter and bulb in invert.
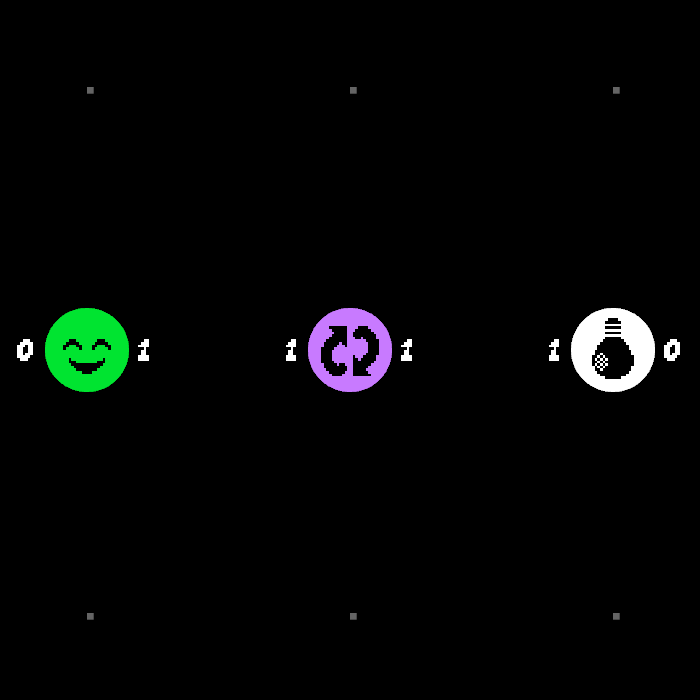
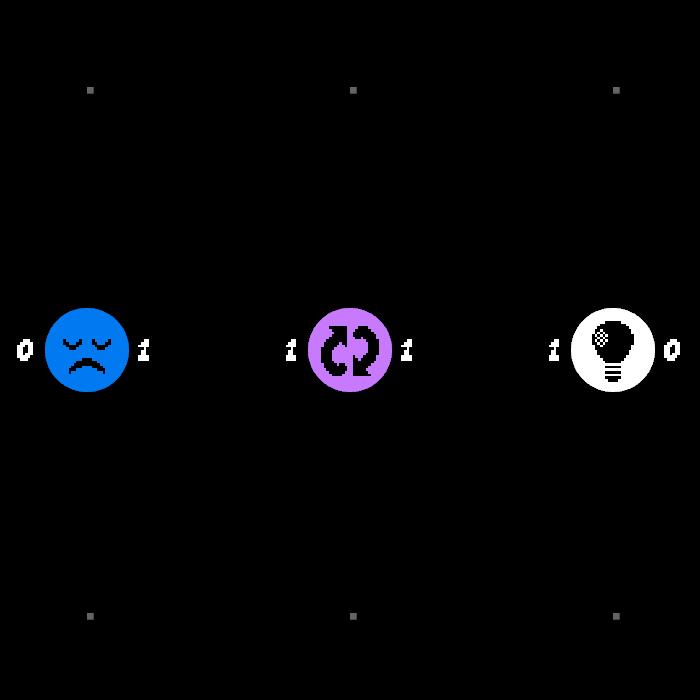
the purpose of these two levels is to demonstrate how the inverter node (the pink/purple one) works.
as its name suggests, it inverts the state of a particle. that is, it converts a heart to an anti-heart (upside down heart) and vice-versa.
in both cases, you cannot solve the level by connecting the emitter directly to the bulb since each bulb wants to receive the inverse version of the particle that the bulb produces.
for example, in invert, the green emitter node produces hearts, but the level contains an anti-bulb which requires an anti-heart to light up. hence, the only way to complete the level is to connect the emitter to the inverter, then the inverter to the bulb.
what i came to dislike about these two levels is that if you have solved the first one, then you can solve the second one by making the exact same connections that you made in the first. as a result, the player may complete these levels without really learning anything.
here’s how i’ve tweaked them:
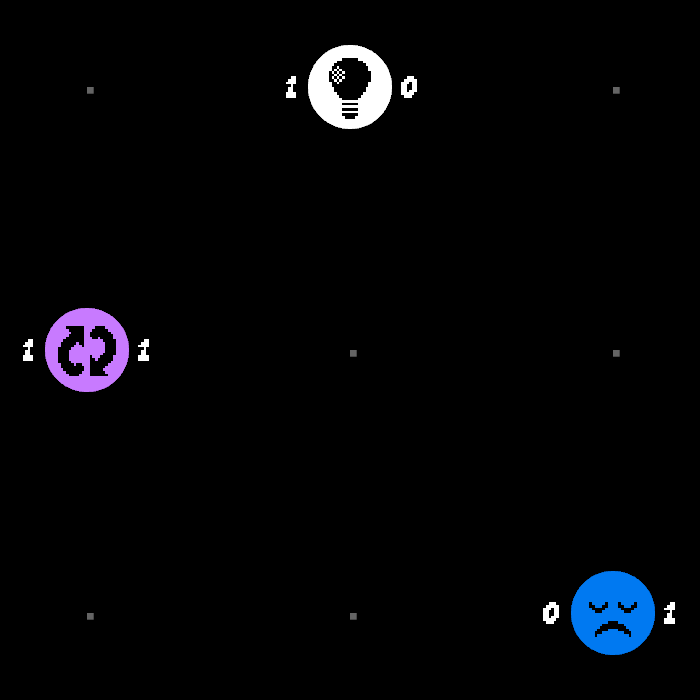
the levels still feature the same nodes, but they’re arranged differently (the second is a reflection of the first).
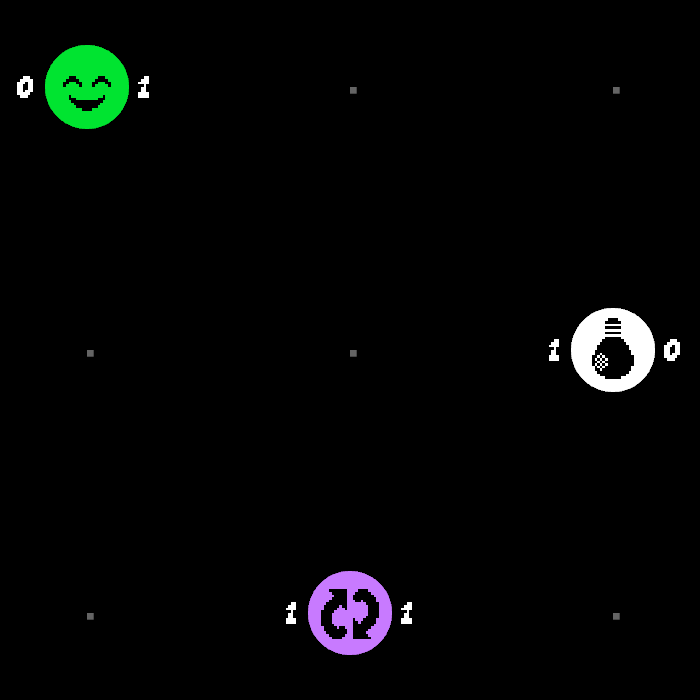
adding a new level
i’ve become quite concerned about the fact that i haven’t added any new levels in quite some time, so i decided to finish off this update by creating the level juxtapose.
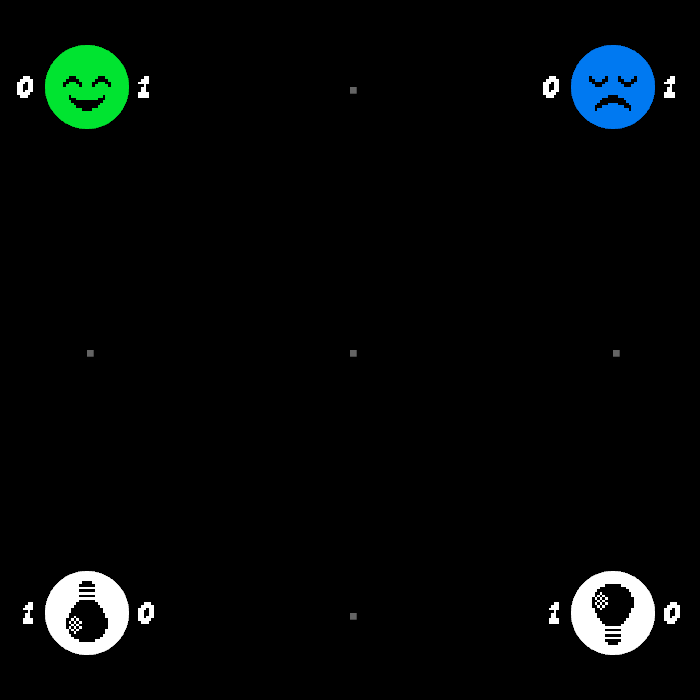
i wanted to create a level that taught the player that the happy face emitters must connect to regular bulbs, whereas the sad face emitters must connect to anti-bulbs.
that is, we are juxtaposing the roles of the two different types of emitters/bulbs.
closing remarks
if you made it this far, thank you for reading. i’ll be uploading these update posts to this blog every tuesday summarising the changes that i’ve made in the previous week.
also, i have a discord that you can join if you want to come and say hello.